单机缓存并发控制
通过互斥锁Mutex实现 LRU 缓存的并发控制
封装一个只读数据结构
- 使用[]byte,支持各种数据类型。
- 封装一个ByteView结构体,并且在返回时,返回一个拷贝,防止缓存值被外部程序修改。
byteview.go
1
2
3
4
5
6
7
8
9
10
11
12
13
14
15
16
17
18
19
20
21
22
23
24
25
26
27
28
29
30
31
32
| package Cache
type ByteView struct {
b []byte
}
func (v ByteView) Len() int {
return len(v.b)
}
func (v ByteView) ByteSlice() []byte {
return cloneBytes(v.b)
}
func (v ByteView) String() string {
return string(v.b)
}
func cloneBytes(b []byte) []byte {
c := make([]byte, len(b))
copy(c, b)
return c
}
|
使用锁进行并发控制
1
2
3
4
5
6
7
8
9
10
11
12
13
14
15
16
17
18
19
20
21
22
23
24
25
26
27
28
29
30
31
32
33
34
35
36
37
38
39
40
41
42
| package Cache
import (
"Cache/Cache/lru"
"sync"
)
type cache struct {
mu sync.Mutex
lru *lru.Cache
cacheBytes int64
}
func (c *cache) add(key string, value ByteView) {
c.mu.Lock()
defer c.mu.Unlock()
if c.lru == nil {
c.lru = lru.New(c.cacheBytes, nil)
}
c.lru.Add(key, value)
}
func (c *cache) get(key string) (value ByteView, ok bool) {
c.mu.Lock()
defer c.mu.Unlock()
if c.lru == nil {
return
}
if v, ok := c.lru.Get(key); ok {
return v.(ByteView), ok
}
return
}
|
主体结构 Group(最核心)
Group是最核心的数据结构,负责用户的交互,并且控制缓存值,存储和获取的流程。
Group流程
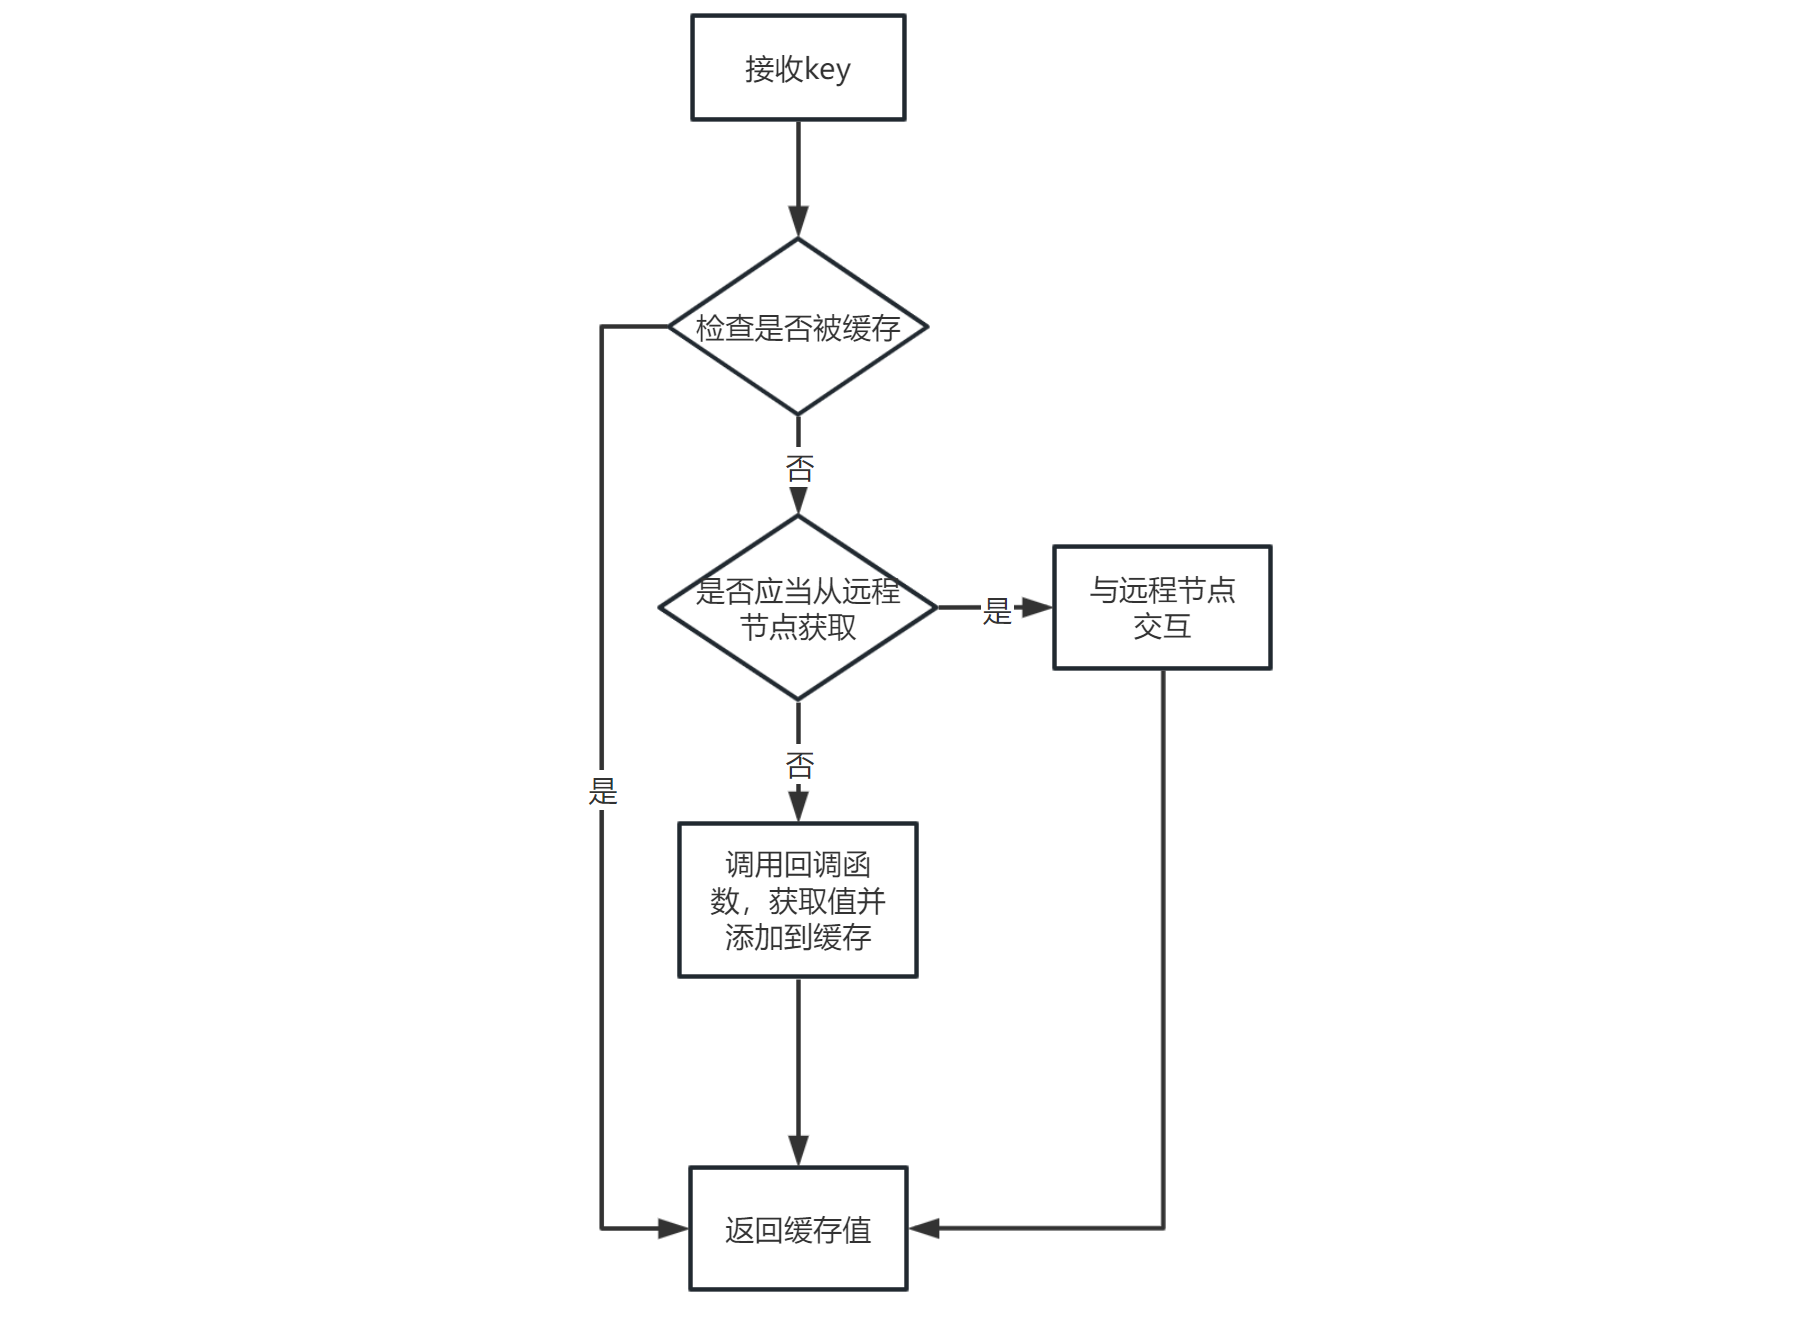
回调函数
如果缓存不存在,应从数据源获取数据并添加到缓存中。
当缓存不存在时,调用这个函数,得到源数据。
gocache.go
1
2
3
4
5
6
7
8
9
10
11
12
13
14
15
16
17
18
19
20
21
22
23
24
25
| package Cache
import (
"fmt"
"log"
"sync"
)
type Getter interface {
Get(key string) ([]byte, error)
}
type GetterFunc func(key string) ([]byte, error)
func (f GetterFunc) Get(key string) ([]byte, error) {
return f(key)
}
|
Group定义
创建Group实例:
- 判断getter是否为空
- 新建Group对象
- 将group对象添加到group中
1
2
3
4
5
6
7
8
9
10
11
12
13
14
15
16
17
18
19
20
21
22
23
24
25
26
27
28
29
30
31
|
type Group struct {
name string
getter Getter
mainCache cache
}
var (
mu sync.RWMutex
groups = make(map[string]*Group)
)
func NewGroup(name string, cacheBytes int64, getter Getter) *Group {
if getter == nil {
panic("nil Getter")
}
mu.Lock()
defer mu.Unlock()
g := &Group{
name: name,
getter: getter,
mainCache: cache{cacheBytes: cacheBytes},
}
groups[name] = g
return g
}
|
从缓存获取key的value(Get最核心方法)
- 获取一个key值,首先查看本地缓存,如果命中直接返回。
- 如果没有命中缓存,调用Getter函数来拉去数据。
1
2
3
4
5
6
7
8
9
10
11
12
13
14
15
16
17
18
19
20
21
22
23
24
25
26
27
28
29
30
31
32
33
34
35
36
37
38
39
40
41
42
43
44
45
46
47
48
49
50
51
52
53
|
func GetGroup(name string) *Group {
mu.RLock()
g := groups[name]
mu.RUnlock()
return g
}
func (g *Group) Get(key string) (ByteView, error) {
if key == "" {
return ByteView{}, fmt.Errorf("key is required")
}
if v, ok := g.mainCache.get(key); ok {
log.Println("[GoCache] hit")
return v, nil
}
return g.load(key)
}
func (g *Group) load(key string) (value ByteView, err error) {
return g.getLocally(key)
}
func (g *Group) getLocally(key string) (ByteView, error) {
bytes, err := g.getter.Get(key)
if err != nil {
return ByteView{}, err
}
value := ByteView{b: cloneBytes(bytes)}
g.populateCache(key, value)
return value, nil
}
func (g *Group) populateCache(key string, value ByteView) {
g.mainCache.add(key, value)
}
|
总结
- 了解了Group设计原理。
- 实现了用互斥锁实现缓存并发控制。

 微信
微信 支付宝
支付宝